
You’ve probably seen this already, but there’s a new fad taking hold on Blipfoto: walking around something and photographing it from a range of angles, and then layering the files and blending them together into a single image. Depending how you do this the results can be anything from misty and slightly dream-like, through Impressionist, to something almost surreal. The technique was originally devised by, and is most strongly associated with, a Catalan photographer called Pep Ventosa. (Prior to a couple of days ago, I thought that Pep Ventosa was a Premier League football manager, which shows how much I know about football. And photography.)
I tried the technique for the first time today, and had so much fun that I know I’ll be having another go at it whenever a good subject presents itself. The featured image is my first attempt, which didn’t work as I’d originally intended because I was using too long a lens: I composed the image from the more open side of the tree, but by the time I reached the hedge at the side of the field it was clear that the tree was now too close and would fill more of the frame than in the early shots – but I carried on anyway, just to see what the effect would be. The dog walker arrived just as I was finishing my circuit, and rather than wait for her to leave I decided to put her in the final frame. When I blended the layers in Photoshop I found that I liked having just a trace of the too-big images, so I left them in at about 5% opacity each, and then played with the others until I got a result that pleased me.
I had more success with my second attempt, using a horse-chestnut tree that stands on a tiny area of grass at the junction of three roads, because I could get to about the same distance away from it for each frame I took. In many ways I like this image more, and was originally going to feature it – but in the end the willow won out because of its atmosphere, and the chestnut was relegated to second spot.
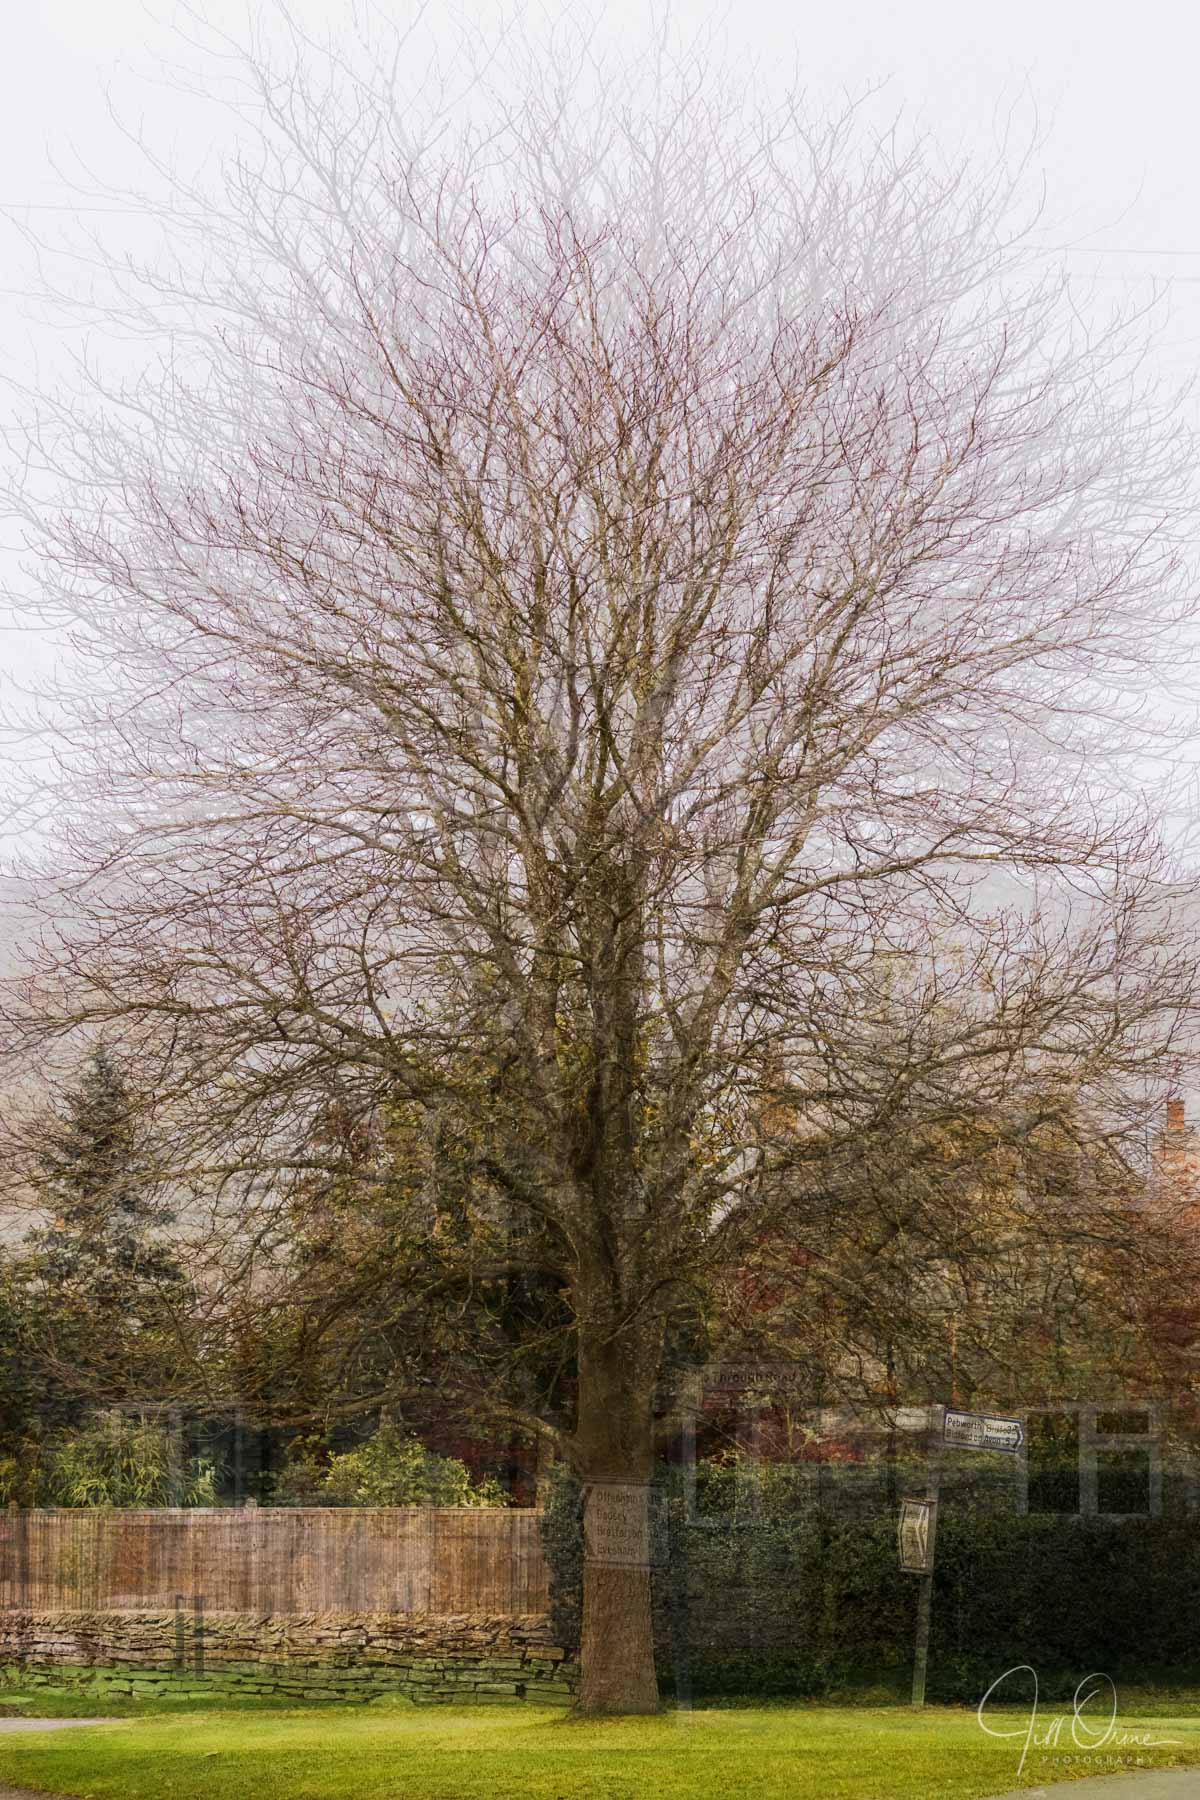
For both images I played with blending modes between each pair of layers, as well as opacity – Overlay and Soft Light are both quite good for this technique, but with the chestnut tree image I also used other modes such as Darken and Linear Light, to change the appearance and weight of different elements from each frame. I wish now that I’d taken screen shots of my process in Photoshop, because I know that if I started over with the raw files I’d arrive at a different result – but actually that’s part of the strength of this technique: depending which frame you choose as your base, and how you then layer the others onto it, you can achieve a unique image every time you revisit the same set of files. I should also say that once I’d flattened the layers in Photoshop, I brought the combined image back into Lightroom to play around with it some more – and because the merged file contains so much information, tweaking the contrast or clarity or changing the colour balance can alter the final result quite dramatically.
Before I go, thanks to everyone who was sympathetic about yesterday’s Great Wine Disaster – and I agree, it was a terrible waste of wine. I realise that I omitted a crucial piece of information when telling the story: it was a rather nice (though luckily not expensive) South African CabSauv Shiraz – in other words, a lovely rich red. I’m happy to be able to tell you that the sofa and carpet seem to have escaped staining, and that the cushion cover (non-washable) appears to have survived being washed. My clothes have also been through the wash and are currently in the dryer – but even if they’re still stained, those of you who’ve met me in person can attest that I generally look as though I’ve slept in a ditch, so in all probability no-one will notice the difference.